Star Crunch Cookies-Homemade Chewy Chocolate Peanut Butter
Star Crunch Cookies are more than just a sweet treat; they’re a nostalgic journey back to childhood, a burst of cosmic delight in every bite. Remember those iconic, foil-wrapped snacks that felt like pure magic? Well, get ready to recreate that whimsical joy right in your own kitchen! These Star Crunch Cookies capture the essence of that beloved original, with their irresistible crispy texture and the unmistakable sweet, slightly chewy core. What makes them so incredibly special is that unique combination of crunch and gooeyness, all wrapped up in a chocolatey shell that’s impossibly satisfying. They’re not just cookies; they’re little edible stars, perfect for sharing with loved ones or indulging in a moment of pure, unadulterated happiness. Prepare to launch your taste buds into orbit with this delightful recipe!
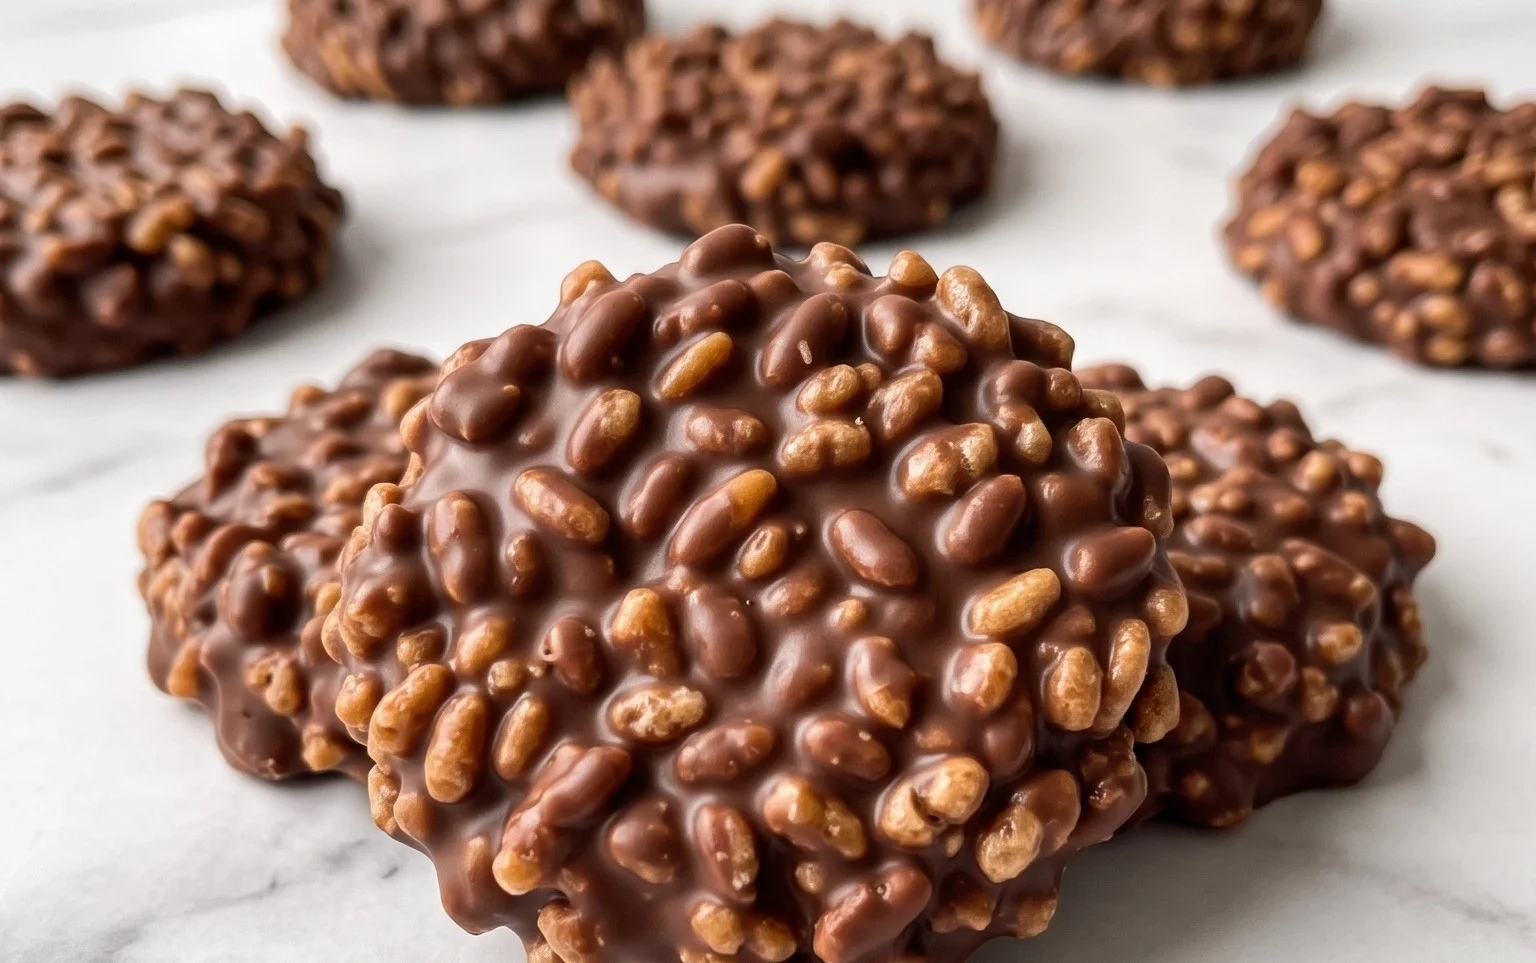
Star Crunch Cookies
Prepare to blast off into a galaxy of flavor with these incredibly easy and ridiculously delicious Star Crunch Cookies! If you’ve ever craved that satisfyingly chewy, chocolatey, peanut-buttery goodness of a classic treat but want something a little more homemade and (dare I say it?) even better, then you’ve landed in the right place. These cookies are a nostalgic trip for many and a delightful discovery for newcomers. They require no baking, which means they come together in a flash, perfect for a quick sweet craving, a party contribution, or just because you deserve a stellar treat. The combination of crispy rice cereal, rich chocolate, creamy peanut butter, and a touch of sweetness creates a texture and taste sensation that is truly out of this world. They’re also incredibly versatile, so feel free to experiment with your favorite nut or seed butters. Get ready to make a batch (or two!) because these disappear faster than a shooting star!
Ingredients:
- 5 cups Crispy Rice Cereal (140g)
- 1 1/2 cups Chocolate Chips (255g)
- 1 cup Peanut Butter (can use any nut or seed butter, 250g)
- 1/4 cup coconut oil (55g)
- 1/2 cup maple syrup (160mL)
Getting Started: The Melting Magic
The first crucial step to achieving that perfect chewy texture and binding all our delightful ingredients together is to create our chocolatey base. In a medium saucepan, combine the chocolate chips, peanut butter, and coconut oil. We’re going to gently melt these together over low heat. The key here is patience and gentle heat. You don’t want to scorch the chocolate or burn the peanut butter, as this can affect the flavor and texture of your final cookies. Stir constantly with a spatula or wooden spoon, coaxing the ingredients to melt into a smooth, glossy mixture. The coconut oil helps to create a smoother, more fluid chocolate sauce, and also contributes a subtle tropical hint that complements the peanut butter wonderfully. If you find your mixture is too thick, you can add another teaspoon of coconut oil, but usually, the proportions here are just right. Keep stirring until there are no visible lumps of chocolate or peanut butter, and you have a beautifully uniform, rich, melted concoction. Once it’s smooth, remove the saucepan from the heat to prevent overheating.
Incorporating the Sweetness and Crunch
Now that we have our luscious chocolate-peanut butter base, it’s time to introduce the liquid sweetness and our star ingredient – the crispy rice cereal. To the melted chocolate mixture, add the maple syrup. Stir this in thoroughly until it’s completely combined. The maple syrup not only adds a lovely, natural sweetness but also helps to give the cookies that characteristic chewy, slightly sticky texture we’re aiming for. It’s that perfect balance between gooey and crunchy. Once the maple syrup is incorporated, it’s time for the crispy rice cereal. Gradually add the 5 cups of crispy rice cereal to the wet ingredients. Using your spatula, gently fold the cereal into the chocolate mixture. The goal here is to coat every single crispy rice puff with the chocolatey goodness. Be gentle as you stir; you don’t want to crush the cereal too much, as we want to retain that signature crunch. It will seem like a lot of cereal, but keep folding and mixing, and it will all come together. Ensure there are no dry pockets of cereal hiding at the bottom of the pan.
Forming Your Stellar Treats
Once the crispy rice cereal is thoroughly coated, the mixture will start to thicken slightly as it cools. This is when we move to shaping our Star Crunch Cookies. You can use a cookie scoop for uniformity, or simply use two spoons to drop mounds of the mixture onto a parchment-lined baking sheet. Another excellent method, and one that I often prefer for its rustic charm, is to lightly grease your hands with a tiny bit of coconut oil or cooking spray and then roll spoonfuls of the mixture into balls. You can also press them down slightly to create a more cookie-like shape, or leave them as little mounds. The size is entirely up to you – make them bite-sized for a party, or larger for a more substantial treat. Aim for consistency in size if you want them to set evenly. The mixture will be sticky, so don’t be afraid to use your hands, but a little bit of oil will make the process much smoother. Work relatively quickly, as the mixture will continue to firm up as it cools.
The Crucial Chilling Phase
This is arguably the most important step for achieving that perfect Star Crunch texture: chilling. Once your cookies are shaped and placed on your parchment-lined baking sheet, it’s time to let them firm up. Place the baking sheet in the refrigerator for at least 30 minutes. For an even firmer cookie that’s easier to handle and has that signature crunch, you can chill them for up to an hour, or even pop them in the freezer for about 15-20 minutes if you’re in a real hurry. The chilling process allows the chocolate and peanut butter mixture to solidify, binding everything together and creating that wonderfully chewy and crunchy consistency that makes these cookies so irresistible. Patience is a virtue here, and it will be rewarded with a perfectly set cookie. You’ll know they’re ready when they feel firm to the touch and hold their shape without being sticky.
Enjoying Your Homemade Galaxy
Once your Star Crunch Cookies have chilled and firmed up, they are ready to be devoured! Carefully peel them off the parchment paper. They are best enjoyed at room temperature or slightly chilled. Store any leftovers (if there are any!) in an airtight container in the refrigerator. They will keep for about a week, though they rarely last that long. You can also freeze them for longer storage; just make sure they are completely frozen on the baking sheet before transferring them to a freezer bag or container to prevent them from sticking together. These cookies are a fantastic no-bake option for bake sales, holiday gatherings, or just a simple afternoon pick-me-up. They’re a crowd-pleaser for all ages, offering a delightful balance of textures and flavors that will have everyone asking for the recipe. Enjoy your homemade celestial delights!
Conclusion:
There you have it! These Star Crunch Cookies are an absolute triumph for any cookie lover. They deliver that irresistible combination of chewy, slightly crisp edges and a wonderfully soft, fudgy center, all with that signature hint of caramel-like sweetness from the brown sugar. The texture is truly remarkable, making them a standout treat for any occasion. I’ve found they’re perfect enjoyed with a tall glass of cold milk, but they also pair beautifully with a warm cup of coffee or tea. For an extra special touch, consider adding a sprinkle of sea salt on top before baking to enhance the caramel notes, or perhaps a handful of mini chocolate chips stirred into the dough for a double chocolate delight. Don’t be shy about experimenting with other mix-ins like toffee bits or chopped nuts – the possibilities are endless! I truly hope you give these Star Crunch Cookies a try. They’re surprisingly easy to make and are guaranteed to become a new favorite in your baking repertoire. Happy baking!
Frequently Asked Questions:
Can I make these Star Crunch Cookies ahead of time?
Absolutely! These cookies store wonderfully. Once completely cooled, they can be kept in an airtight container at room temperature for up to 3-4 days. They often taste even better the next day as the flavors meld together.
What makes them have that “crunch” without actual crunchy ingredients?
The magic of the Star Crunch Cookie texture comes from a few key elements. The combination of brown sugar and granulated sugar in the dough, along with the specific baking time, creates a delightful chewiness around the edges while keeping the center wonderfully soft and almost fudgy. This contrast in textures is what gives them their unique appeal, mimicking a satisfying crunch without needing added hard pieces.
Star Crunch Cookies
No-bake, chewy, and chocolatey cookies inspired by the classic snack. Easy to make with simple pantry ingredients.
Ingredients
-
5 cups Crispy Rice Cereal (140g)
-
1 1/2 cups Chocolate Chips (255g)
-
1 cup Peanut Butter (250g)
-
1/4 cup coconut oil (55g)
-
1/2 cup maple syrup (160mL)
Instructions
-
Step 1
Line a baking sheet with parchment paper. -
Step 2
In a large bowl, combine the crispy rice cereal and chocolate chips. -
Step 3
In a small saucepan over low heat, melt the peanut butter, coconut oil, and maple syrup, stirring constantly until smooth. -
Step 4
Pour the melted mixture over the cereal and chocolate chips. Stir well to coat everything evenly. -
Step 5
Drop spoonfuls of the mixture onto the prepared baking sheet, shaping them into cookie-like rounds. -
Step 6
Refrigerate for at least 30 minutes, or until firm.
Important Information
Nutrition Facts (Per Serving)
It is important to consider this information as approximate and not to use it as definitive health advice.
Allergy Information
Please check ingredients for potential allergens and consult a health professional if in doubt.