Apple Butter Cheesecake – Spiced Autumn Treat
Apple butter cheesecake is a dream come true for anyone who adores the cozy, comforting flavors of autumn. Imagine the rich, creamy indulgence of a classic cheesecake, now elevated with the warm, spiced sweetness of homemade apple butter. It’s a dessert that whispers of crisp fall air, crackling firesides, and the simple joy of shared moments. Why do we love this concoction so much? It’s the perfect marriage of textures and tastes: the smooth, velvety cheesecake base embraces pockets of intensely flavored apple butter, creating a symphony on your palate. What truly makes this apple butter cheesecake special is its ability to capture the essence of the season in every bite, offering a delightful twist on a beloved classic that’s both sophisticated and incredibly comforting. Get ready to fall in love with this autumnal masterpiece!
Apple Butter Cheesecake
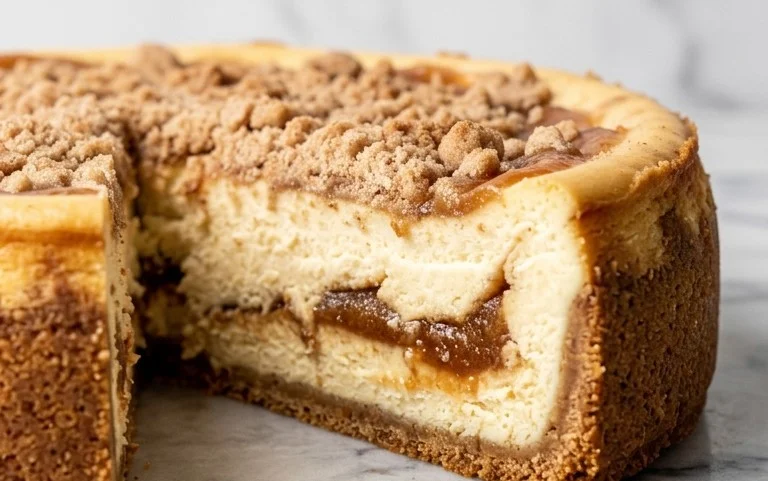
Prepare to embark on a delightful culinary journey with this Apple Butter Cheesecake. It’s a dessert that beautifully marries the creamy indulgence of cheesecake with the warm, spiced essence of autumn. The subtle sweetness and deep fruit notes of apple butter infuse every bite, creating a truly memorable experience. This recipe is designed to be straightforward yet yields a dessert that looks and tastes like it came straight from a gourmet bakery. So, preheat your ovens and let’s get started on creating this masterpiece!
Ingredients:
- 2 cups (204 g) graham cracker crumbs (from about 12-13 full sheets, crushed)
- ½ teaspoon cinnamon
- ½ cup (1 stick / 113 g) unsalted butter, melted
- 2 packages (8 ounces each) cream cheese, softened
- 1 cup (200 g) granulated sugar
- 2 cups (476 g) heavy cream
- ¾ teaspoon fresh lemon juice
- ½ cup (120 g) apple butter
Instructions:
- Preparing the Crust: To begin, we need to create a sturdy and flavorful base for our cheesecake. Take your graham cracker crumbs and place them in a medium-sized bowl. Add the ½ teaspoon of cinnamon to the crumbs. This step is crucial for adding a warm, comforting spice note that complements the apple butter beautifully. Next, pour in the ½ cup of melted unsalted butter. Stir everything together thoroughly until the graham cracker crumbs are evenly moistened with the butter. The mixture should resemble wet sand. Now, press this crumb mixture firmly and evenly into the bottom of a 9-inch springform pan. You can use the bottom of a glass or a measuring cup to help you compact the crumbs, ensuring a solid crust that won’t crumble when you slice the cheesecake. For an even more robust crust, you can press some of the crumbs up the sides of the pan as well, about half an inch. Place the prepared crust in the freezer while you work on the filling. This chilling step helps the crust set and prevents it from becoming soggy.
- Making the Cream Cheese Filling Base: Now for the heart of our cheesecake! In a large mixing bowl, combine the 2 packages of softened cream cheese and the 1 cup of granulated sugar. It is absolutely essential that your cream cheese is softened to room temperature. Cold cream cheese will result in a lumpy filling. You can achieve this by leaving it on the counter for about an hour or by gently microwaving it for short intervals. Using an electric mixer (a stand mixer with a paddle attachment or a hand mixer), beat the cream cheese and sugar together on medium speed until the mixture is completely smooth and creamy, with no lumps. Scrape down the sides of the bowl frequently to ensure everything is incorporated. This smooth base is the foundation for a silky-textured cheesecake. Once smooth, add the ¾ teaspoon of fresh lemon juice. The lemon juice is not for a prominent lemon flavor but acts as a subtle enhancer, brightening the flavors and cutting through the richness of the cream cheese. Beat until just combined.
- Incorporating the Apple Butter and Cream: This is where our star ingredient, the apple butter, comes into play! Add the ½ cup of apple butter to the cream cheese mixture. Stir it in until it’s well distributed. Don’t worry if there are a few little swirls of apple butter; they will bake into beautiful ribbons of flavor. Now, gradually pour in the 2 cups of heavy cream. Continue to mix on low speed until everything is just combined. Be careful not to overmix at this stage, as too much air incorporated into the batter can lead to cracks in the finished cheesecake. The batter should be thick and smooth, with a lovely, uniform color. The consistency should be pourable but not runny.
- Baking the Cheesecake: Gently remove the chilled crust from the freezer. Carefully pour the cheesecake batter over the graham cracker crust, spreading it evenly with a spatula. To prevent cracking and ensure even baking, we’ll use a water bath. Wrap the bottom of your springform pan tightly with heavy-duty aluminum foil, ensuring no water can seep in. Place the foil-wrapped springform pan into a larger roasting pan. Carefully pour hot (but not boiling) water into the roasting pan, making sure the water comes about halfway up the sides of the springform pan. This water bath creates a humid environment, which helps the cheesecake bake gently and prevents it from drying out or developing cracks. Carefully transfer the roasting pan with the cheesecake into your preheated oven (typically set to 325°F or 160°C). Bake for approximately 50-60 minutes, or until the edges of the cheesecake are set but the center still has a slight wobble when you gently jiggle the pan. Overbaking will result in a dry, cracked cheesecake.
- Cooling and Chilling for Perfection: Once the baking time is complete, turn off the oven but leave the cheesecake inside with the oven door slightly ajar. Allow it to cool in the oven for another hour. This gradual cooling process is another critical step to prevent cracking. After the hour in the oven, remove the cheesecake from the water bath and the roasting pan. Carefully remove the foil from the springform pan. Let the cheesecake cool completely on a wire rack at room temperature. Once it has reached room temperature, cover the cheesecake loosely with plastic wrap and refrigerate for at least 4-6 hours, or preferably overnight. This chilling period is absolutely essential for the cheesecake to fully set and for its flavors to meld beautifully. A well-chilled cheesecake will be firm and incredibly delicious. When ready to serve, carefully run a thin knife around the edge of the pan before releasing the springform side. This simple step ensures a clean release and a beautiful presentation for your Apple Butter Cheesecake. Enjoy every decadent bite!
Conclusion:
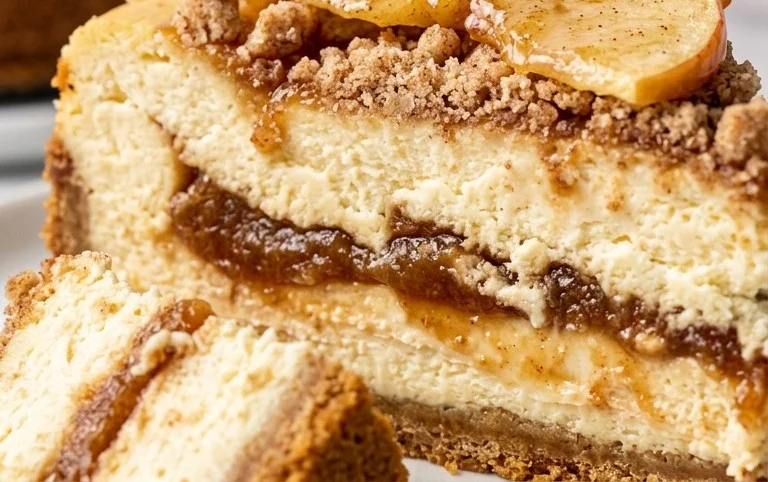
I truly hope you’re as excited to try this Apple Butter Cheesecake as I am to share it with you! This recipe is a delightful fusion of comforting autumn flavors and creamy, decadent cheesecake. The rich, spiced notes of the apple butter swirl beautifully through the smooth, tangy cheesecake filling, creating a truly unforgettable dessert. It’s perfect for special occasions, cozy evenings, or simply when you crave something truly special.
For serving, I highly recommend a dollop of fresh whipped cream or a sprinkle of toasted pecans to enhance the textural contrast and complementary flavors. This Apple Butter Cheesecake also makes a fantastic centerpiece for holiday gatherings.
If you’re feeling adventurous, consider adding a pinch of cardamom to the apple butter mixture for an extra layer of warmth, or a tablespoon of bourbon extract for a sophisticated adult twist. You can also experiment with different crusts – a graham cracker crust is classic, but a gingersnap or shortbread crust would be equally divine. Don’t hesitate to get creative! Give this Apple Butter Cheesecake a go; I’m confident you’ll love the delicious results.
Frequently Asked Questions:
Can I make this Apple Butter Cheesecake ahead of time?
Absolutely! This cheesecake is best made at least a day in advance. This allows the flavors to meld beautifully and the cheesecake to set completely, resulting in a firmer, more enjoyable texture. Store it covered in the refrigerator.
My apple butter is very thin. Will it affect the cheesecake?
If your apple butter is particularly thin, it might add a bit more moisture to the cheesecake filling. To counteract this, you can try simmering it for a few extra minutes to reduce it slightly before swirling it into the batter. However, even a thinner apple butter will still yield a delicious flavor.
Apple Butter Cheesecake
A creamy and decadent cheesecake infused with the warm flavors of apple butter and graham cracker crust.
Ingredients
-
2 cups (204 g) graham cracker crumbs
-
½ teaspoon cinnamon
-
½ cup (1 stick / 113 g) unsalted butter, melted
-
2 packages (8 ounces each) cream cheese, softened
-
1 cup (200 g) granulated sugar
-
2 cups (476 g) heavy cream
-
¾ teaspoon fresh lemon juice
-
½ cup (120 g) apple butter
Instructions
-
Step 1
Preheat oven to 350°F (175°C). Line a 9-inch springform pan with parchment paper. -
Step 2
In a medium bowl, combine graham cracker crumbs, cinnamon, and melted butter. Press mixture firmly into the bottom of the prepared springform pan. -
Step 3
In a large bowl, beat cream cheese and granulated sugar until smooth. Gradually beat in heavy cream and lemon juice. -
Step 4
Gently fold in the apple butter until just combined, creating swirls. -
Step 5
Pour the filling over the crust. Bake for 50-60 minutes, or until the edges are set and the center is slightly jiggly. -
Step 6
Turn off the oven, crack the door open, and let the cheesecake cool inside for 1 hour. Remove from oven and cool completely on a wire rack. Chill for at least 4 hours before serving.
Important Information
Nutrition Facts (Per Serving)
It is important to consider this information as approximate and not to use it as definitive health advice.
Allergy Information
Please check ingredients for potential allergens and consult a health professional if in doubt.